If you have a hiking or backpacking trip coming up soon, here’s a list I’ve curated of my favorite websites that provide useful information to know before beginning your trip!
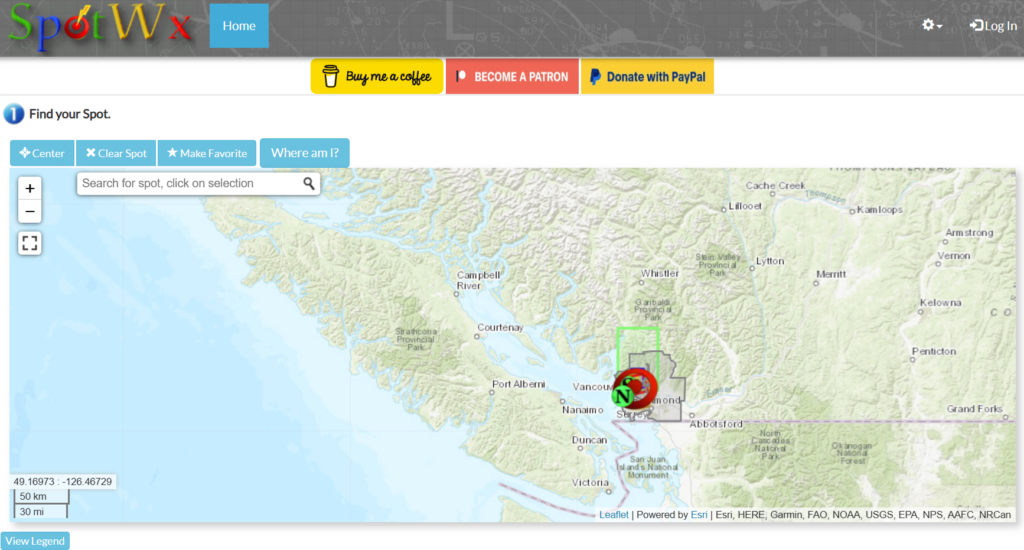
Spot WX: (https://spotwx.com/) Spot Wx is a phenomenal weather website that uses geolocations to give precise weather forecasts for an area. This website provides specific and accurate information for precipitation, wind, daylight hours, sunrise and sunset times, and temperatures. The best feature is often there is 2 day, 3.5 day, 5 day, and 7 day predictions. Of course the smaller the number of days the more accurate the prediction will be. The maps can sometimes be challenging to read, but they have a key to help you decipher the information.
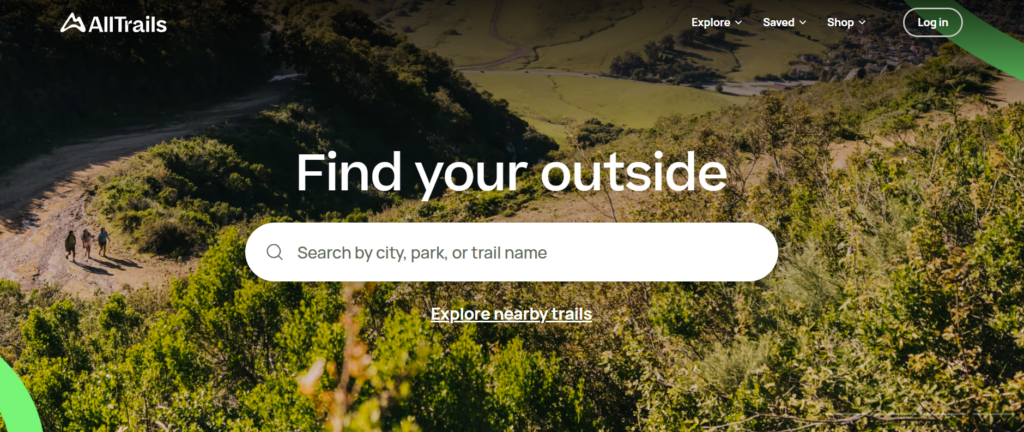
AllTrails: (https://www.alltrails.com/)This website and mobile app is by far my favorite. I do pay a yearly subscription of 40$, but it is SO worth it. This app gives you detailed trail maps, trail reviews, pictures, and has a GPS feature that tracks you along the trail. If I am ever unsure of which direction a trail goes, I quickly pull out AllTrails and a helpful arrow will point me in the right direction. This is an AWESOME gift to give to any of your hiker friends!
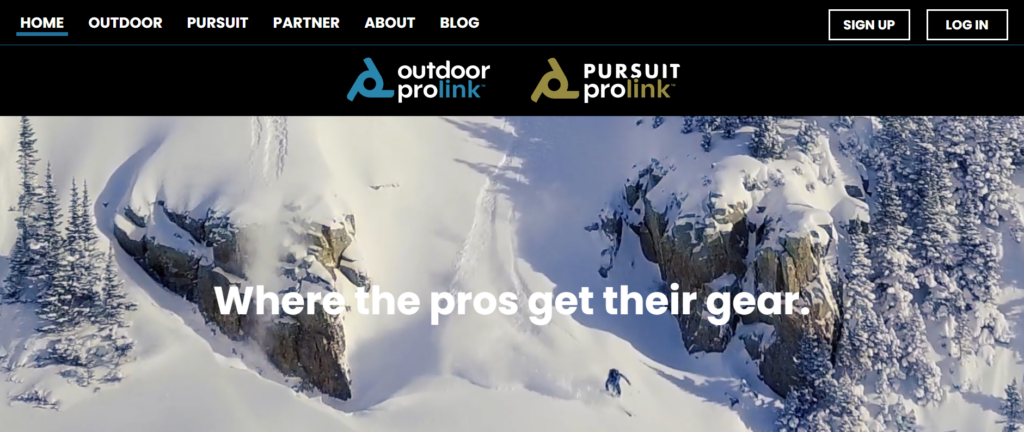
Outdoor Prolink: (https://outdoorprolink.com/) This is my favorite website for when I am looking to buy new outdoor gear. Creating an account with Prolink is only available for certain individuals who currently have a job or career related to the outdoors. The basis of the website is to give these individuals coupons or specialty deals on gear and equipment! These deals are sometimes up to 30 or 40% off (which quickly adds up if it is a multi-hundred dollar piece of gear)!! If you are curious about if you are eligible, check out their website and there is a long list of criteria. If still unsure, you can reach out to them or to your employer to see if this is a tool accessible to you!
If you are about to go on a hiking or backpacking trip (either alone or with friends) make sure you have taken all the necessary safety precautions before embarking on your journey. I have created a checklist of questions that you should ask yourself before you leave for your trip! Answer each question and follow the appropriate steps to complete the requirement.
Have you done research on the difficulty of the trail, and is it suited for your physical fitness level?
What is the forecasted weather, and is there a possibility it will change for the worse?
Have you packed all the 10 Essentials? (If wondering what this is, check out my other post “Packing Essentials”).
Have you informed a close family member or friend of your trip, and given them an itinerary of where you will be and how long you will be gone?
If you are going out of service, have you packed a GPS messaging device? If not, have you informed a close friend or family member about the duration of the trip, and how long to wait without hearing from you until they must contact emergency services? (Search & Rescue).
If applicable, have you obtained the proper permits or permissions to access this trail?
Do you have all the necessary gear/equipment to be safe on this trail?
Always better to be safe than sorry! The world is beautiful to explore, but ensuring you and your party will be safe should be your top priority! Never compromise your safety in the hurry to experience a trail 🙂
If you are going on a hiking or backpacking trip soon, don’t fear!! I have created a list with all the equipment, gear, clothes, and often-forgotten items that you will need to pack! Check it out below:
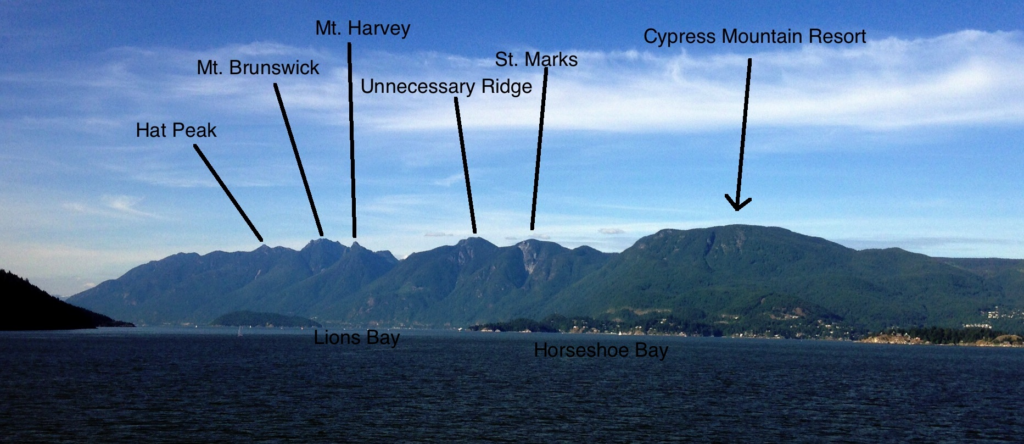
(Image from https://gripped.com/routes/howe-sound-crest-trail/)
This trail is a classic Vancouver trail that explores many of the local mountain peaks! I have been wanting to do this hike for ages, and am working with friends to make this trip a reality. To help us with planning, I’m going to add all the necessary info here into this post, and once I hike it I will come back and update this post with all my pictures and extra thoughts/opinions.
This trail is typically rated as “Very Difficult”, and requires hikers to be somewhat experienced, as well as having lots of time to complete the full trail. The trail is a total of 29km, with just over 1800m of up-and-down elevation gain. For the purpose of this post I am going to plan out the trip in a day-to-day itinerary, so if we are to hike it in the late Spring we have a set plan already.
Things to note: Best to do this hike if the weather is going to be completely dry, and has been for a day or two beforehand as well. There are segments that are slippery otherwise, and make the hike far more technical. This hike also has some epic but intense heights, so if you are afraid of heights, watch a few videos on the tricky segments of the trail to be aware of what to expect. From everyone I have talked to, and reviews I have read: Hiking Poles are SUPER helpful. A good stick is also an alternative.
Day 1: The trail is a point-to-point, so we would drive both cars to Porteau Cove, and drop one car off, and then pile into one car to drive to Cypress Mountain Parking Lot. Best to park at the lot closest to the ski lodge if possible. We begin the hike up to St. Marks Summit for around 5.5 km, and once at the peak, definitely worth it to take a super short detour to see the views of the ocean! Continue along the trail towards the two peaks of Mount Unnecessary, and then to The Lions. (If we would like, we can hike up the West Lion for some insanely cool views, and to check that additional peak off the bucket list!). At this point we will probably want to take a break, eat, and enjoy the views. Once we are ready to continue, we will hike towards and up James peak, and continue towards and summit David peak. After traversing down David peak we will reach Magnesia Meadows. This is said to be a beautiful place to camp, so we could set up camp, eat dinner, and enjoy the evening.
Day 2: Depending how early we start the day, and how much energy we have, we can choose to summit Brunswick Mountain. There is a well marked junction that will indicate going up to Brunswick, or continuing along the trail to head into Lions Bay. (I hiked Brunswick mountain last year, and it is STUNNING. It’s the highest peak in the lower mainland area, and the views are insane — I would say definitely worth it to add, although it IS a very steep incline, and would add exhaustion to the trip for sure). After Brunswick, we hike back along the Howe Sound Crest trail along Hat Pass. We will pass by Brunswick Lake Hut, and will pass a nice creek and waterfall to refill on water if needed. We can either camp at Brunswick Lake, OR continue for another few kilometers to Deeks Lake. We could also camp here for the night and enjoy a swim (might be refreshing but definitely freezing cold in May).
Day 3: Today will be a long descent, with continue decreasing elevation until we reach the parking lot in Porteau Cove. The final 2km is along a logging road that leads to the parking lot. From here we will have to either pile everyone into a 7 seater car, OR take a few people in one vehicle back to Cypress mountain, pick up the second vehicle and drive back to Porteau Cove to get the second car and rest of the crew.
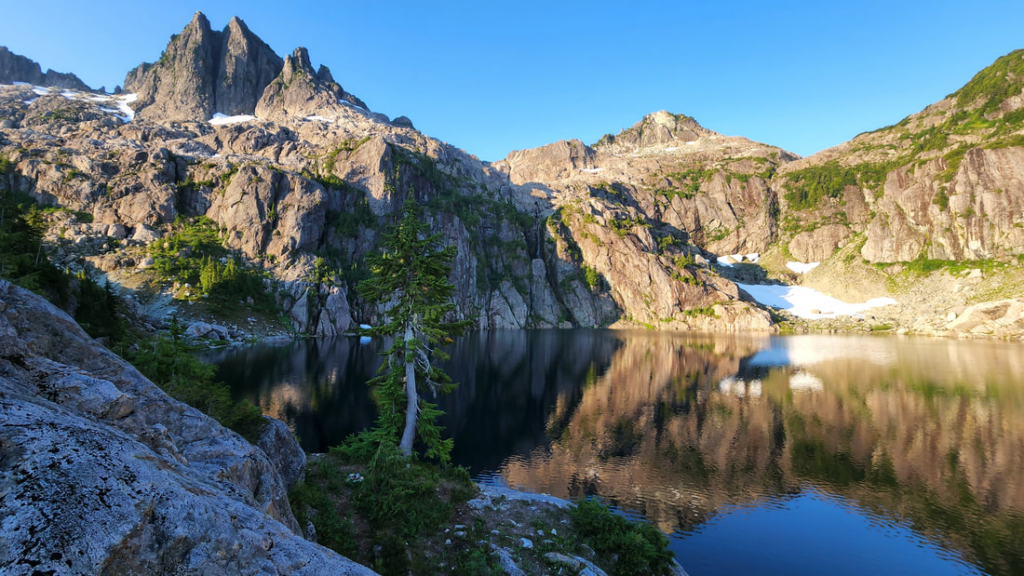
Triple Peak is another one of my top bucket lists trips! I am hoping to tackle this incredible hike sometime this summer, potentially adding it onto my 5040 Peak trip (hit two birds with one stone!). See my other post for more details on 5040 Peak.
Image by LemkeClimbs
This hike is located in the center of Vancouver Island, around 3 hours from Victoria or a 1.5 hours from Tofino. According to AllTrails, this is a 6.4km out-and-back trip with roughly 950m of elevation gain, so although it is quite short distance-wise, it has very steep sections of elevation gain, so poles are recommended, and taking it slow to avoid slipping or tripping on roots. The trailhead is located approximately 10km in on the Marion Creek Forest Service Road.
Terrain: The trail itself varies from forest hiking to some open rock faces, and passes by many beautiful waterfalls. Hiking poles are recommended as it will help with stability, especially when hiking down the steep sections.
Camping: This trail can absolutely be done as a day trip, but as many of my other posts say, I much prefer to make a 1-night camping trip out of any mountainous steep hike. Might as well rest and enjoy the summit for the night rather than quickly needing to traverse back down. There are some flat sections of rock that a small tent could fit on.
Time of year: Triple Peak apparently has snow/ice for most months of the year, so the most ideal time to hike it is in July/August. However, the bugs are said to be quite bad during the summer months, so bug spray and long sleeves are a must.
I’m SO excited to (hopefully) get to check off this hike from my bucket list this summer!!
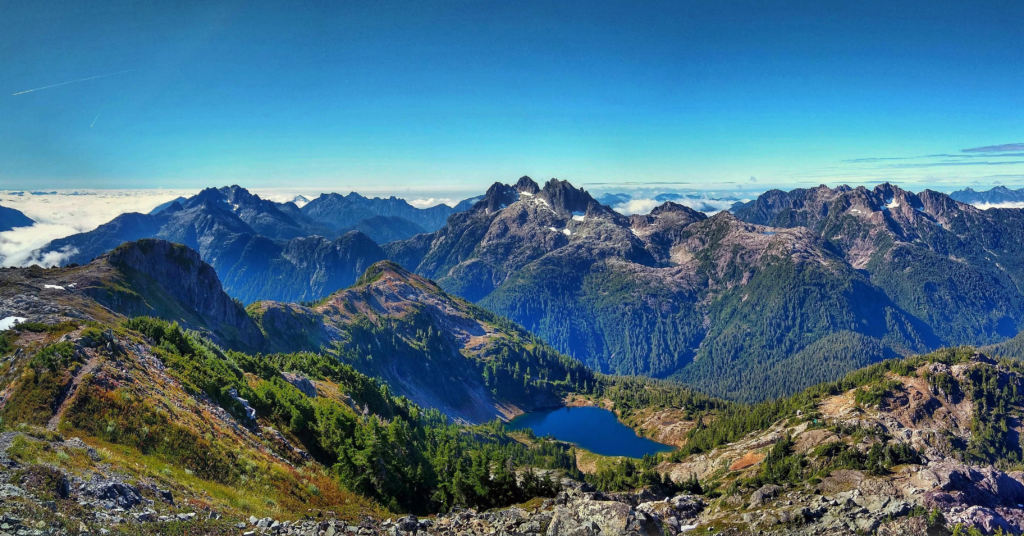
For nearly 3 years I have had 5040 peak on my bucket list for a future backpacking trip. I have made up my mind that it will no longer sit in my list, and I am officially doing it this summer. I have a group of friends who are going to do it with me, and we are excited to tackle this hike. To prepare me for it, I am going to research and find as much information as I can about it, that way when I am ready to do the hike in July, I can check my blog to mentally prepare myself, and pack all the necessary gear.
According to AllTrails.com, 5040 Peak via the Cobalt Lake Trail is an 8.4km out-and-back trip, with 933m of elevation gain. It is estimated to take just under 5 hours to complete. It sounds like most people do this hike in a day, but from my past experience, I have found that (if weather permits) it is so much more enjoyable to do a half-day hike, but then camp at the summit and enjoy the sunset and the next day’s sunrise as well.
Location: The trailhead starts approximately 9km down Marion Creek Forest Service Road, and 4×4 is recommended. Thankfully I have a 4×4 vehicle so that should not be an issue. 🙂 The mountain is located in the center of Vancouver Island, approximately a 3.5 hour drive from Victoria, or a 2 hour drive from Nanaimo.
Things to note: There is a bear cache at the upper campground, as well as a compositing pit toilet. Bringing lots of water is recommended, as the trail is very steep, and there is only one waterfall approximately midway through the hike where water can be collected and filtered. Apparently the mosquitos are HORRIBLE. Every website I check out, the mosquitos seem to be a common factor if you hike 5040 in the summer. So, bug spray evidently is an absolute must.
Once I complete this hike this summer I will come back to this post and add in all the pictures I will take! Getting very excited from planning this epic trip out!
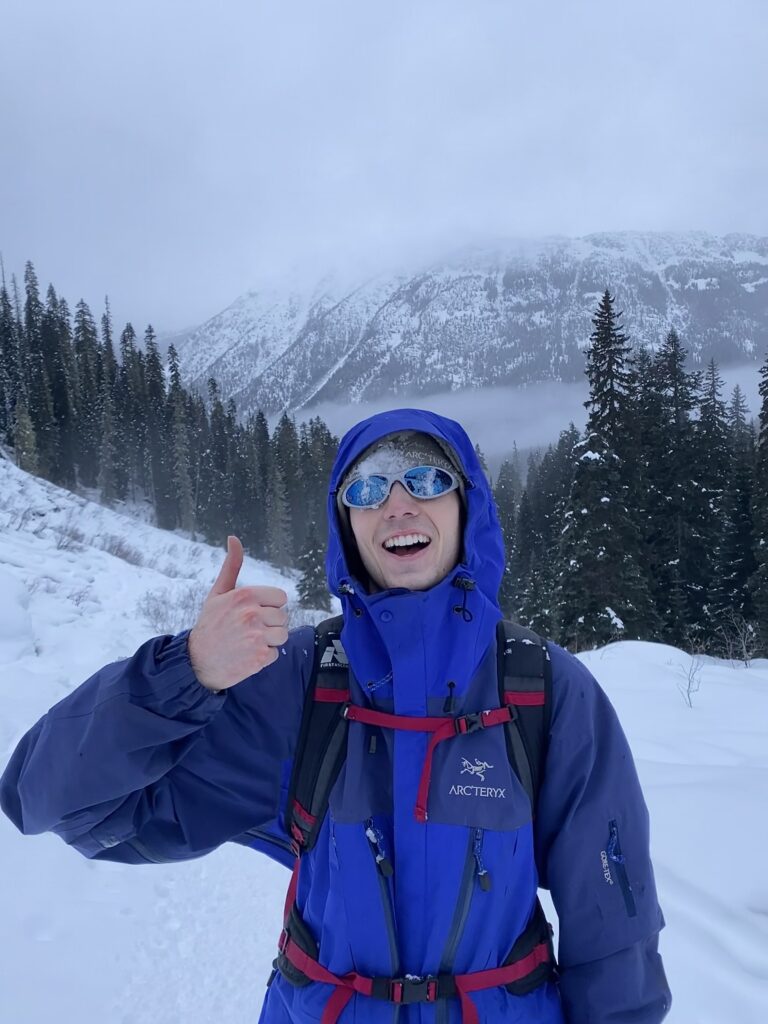
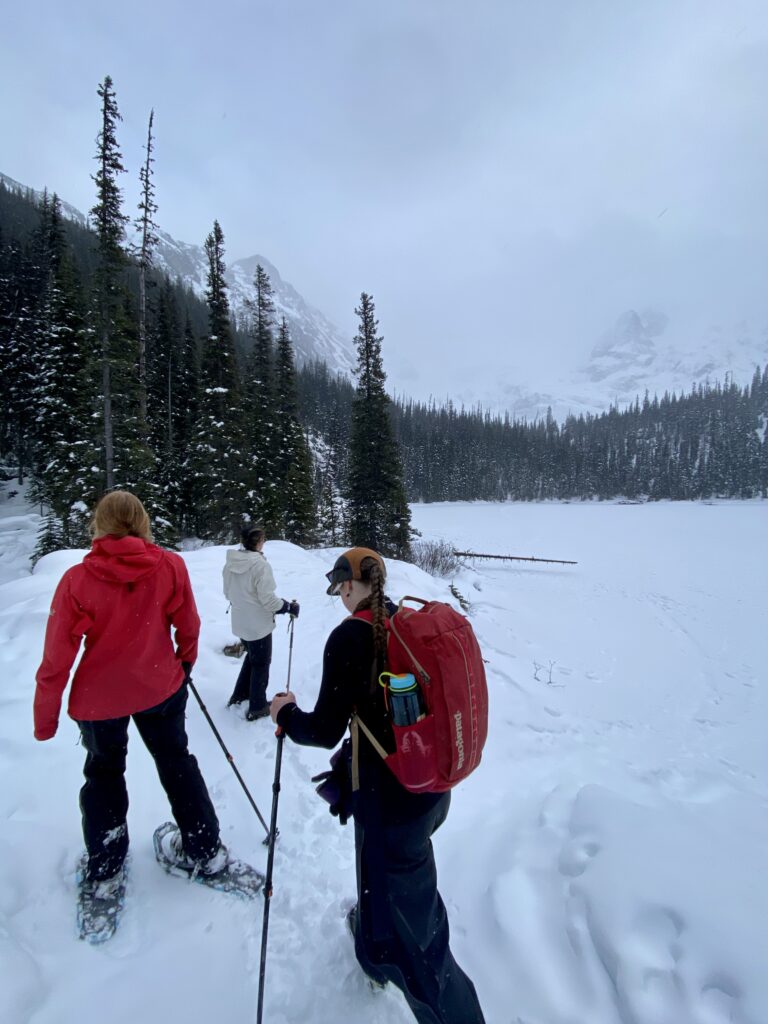
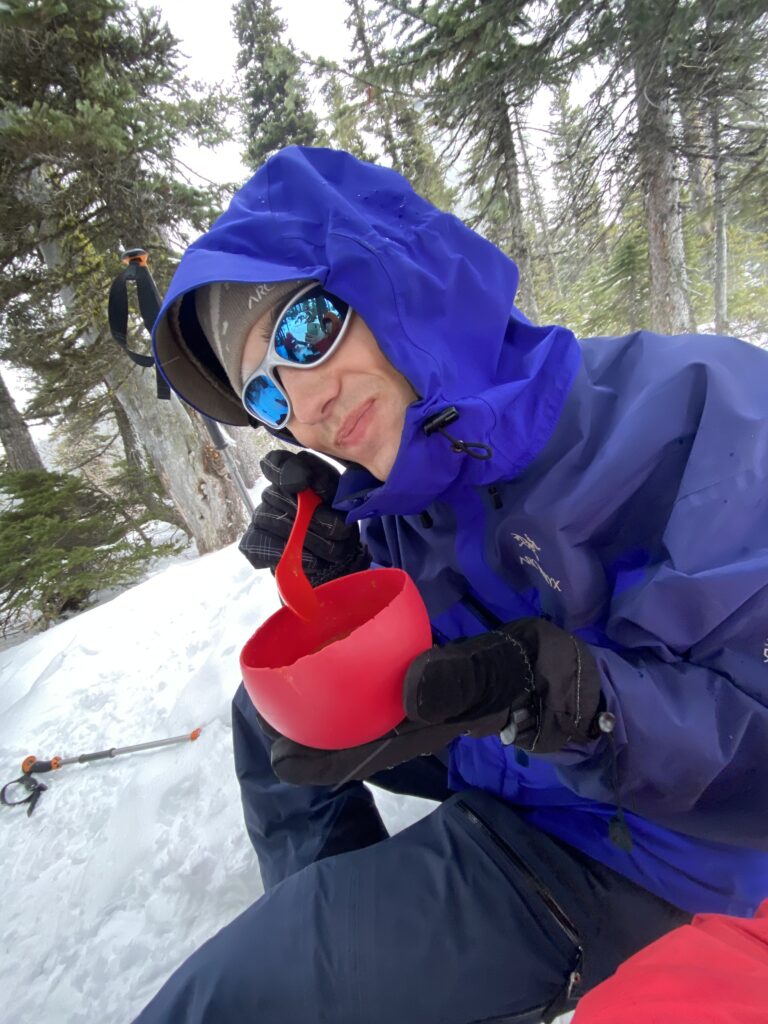
Last week some friends and I hiked Joffrey Lakes in Pemberton, BC. I had done this hike before during the summer season, but there was something very special about doing it in winter! Of course the lakes themselves were frozen over and covered in a sheet of snow, but still getting to experience a hike in the mountains was enjoyable all the more.
Location: Joffrey Lakes is located just a 30 minute drive out of Pemberton, and has a decent sized parking lot. Due to it being the off-season, we were 1 of 2 cars in the whole lot! The road leading up to the parking lot was plowed, yet snow-tires are recommended as there are some steep climbs and winding roads.
Duration: The hike itself is 7.4km round trip with 485m of elevation gain, and is generally estimated to be around 4 hours round trip. Due to it being snowy, we took around 1.5 hours to hike up as the trail was empty and we had the proper gear, but around 2.5 hours on the way down, as the temperature had dropped slightly and there were some icier patches that we wanted to be careful on.
Type of terrain/difficulty: The terrain is relatively easy, as the elevation is slow and gradual, and the trail is not overly tedious (never needing to use hands and knees). The trail is very scenic as it meanders through the forest, passing by the first lake after the first 300m, and then the next two lakes at km 2.8 and 3.6.
Packing Essentials: The trail is quite far from civilization, and cell reception was spotty and sometimes null. For the summer season, the trail is so busy and park rangers are always present that having a satellite radio such as an In-Reach is likely not needed, however for the winter season this was a good precaution in case anything were to happen. We also had all our 10 essentials with us (see my other post for the full list), as well as wearing fully waterproof gear, cramp-on attachments or snowshoes, and balaclavas and sunglasses to protect our face from the snow. Pro-tip: Bring warm soup or chili in a thermos!! We had the most delicious meal at the final lake, definitely worth carrying the extra weight 😉
I would highly recommend this hike for the summer or winter season! Be sure to plan ahead to reserve a spot in the summer, as the reservations fill up incredibly fast!
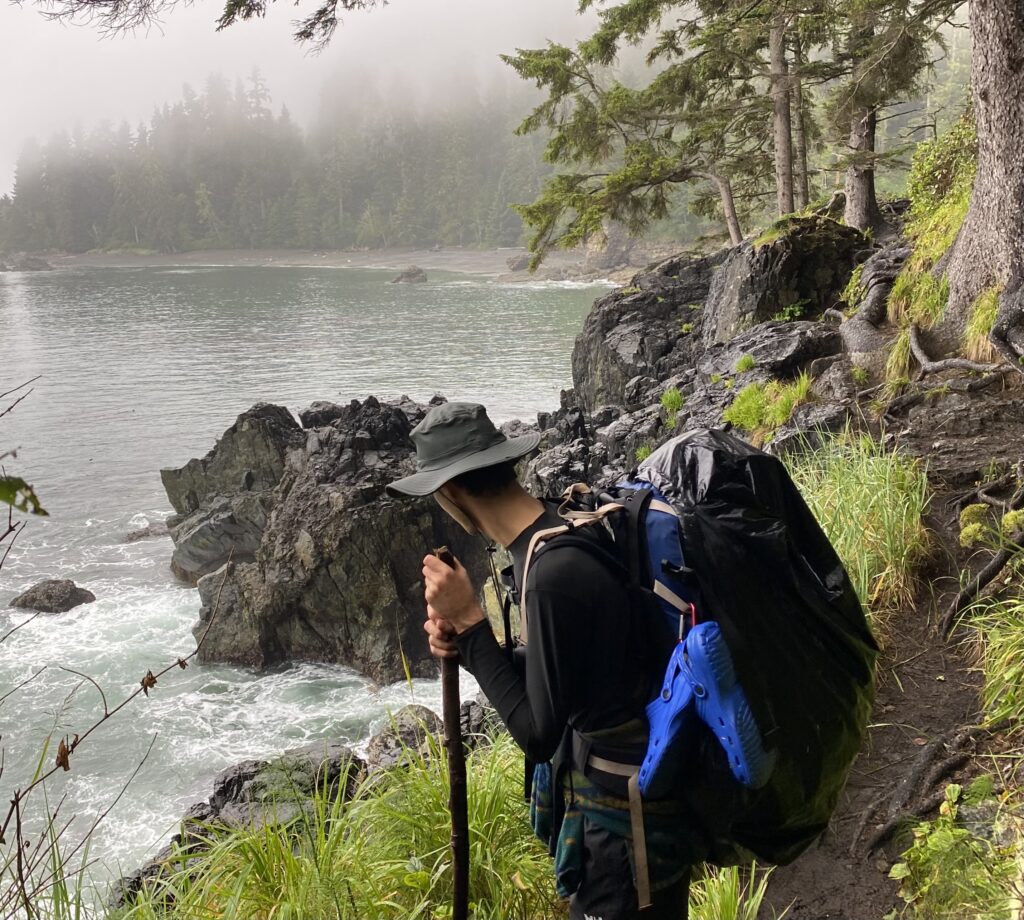
This past summer I backpacked a segment of the Juan De Fuca trail, located on the western coast of Vancouver Island, British Columbia. This trail was the most unique trail I have backpacked so far. I typically lean towards mountain hiking, but this trail entailed forest hiking, beach walking, and crossing of many bridges, some ladders, and even rappelling with rope.
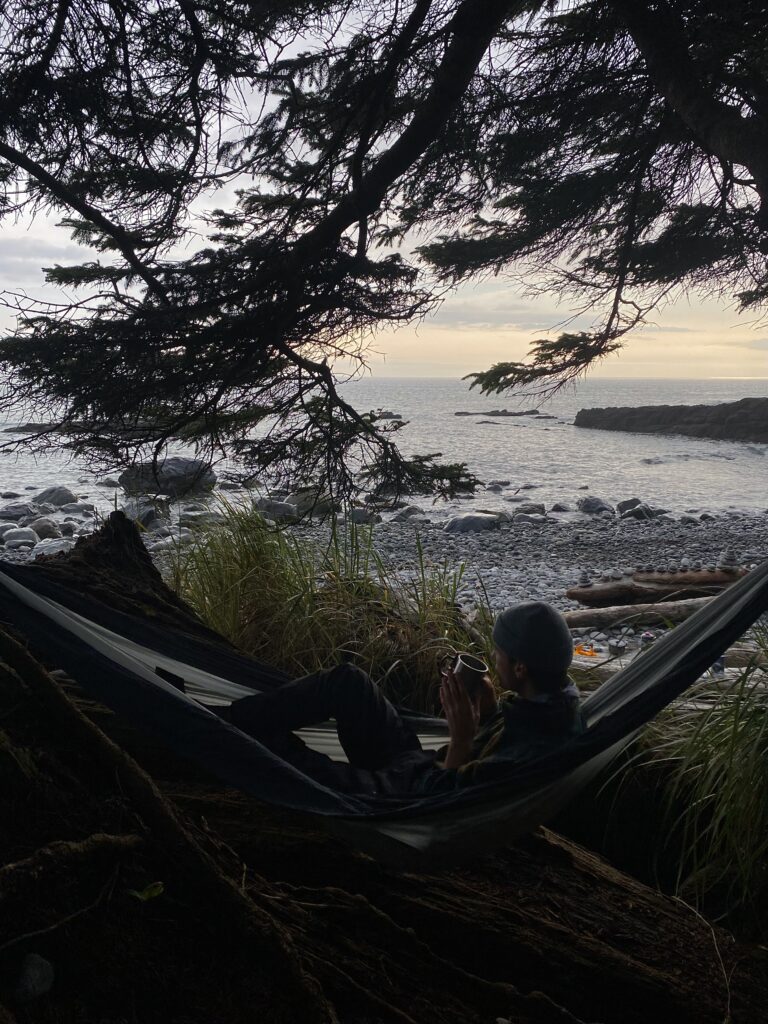
Day 1: We parked our car at the Juan De Fuca trailhead – China beach terminus, and began our trip. The terrain was mainly in the forest, with continuous ups and downs, and frequent views to the ocean. The total distanced hiked on the first day was just over 10km. We stopped briefly at Mystic beach to view the famous waterfall, and watch the waves lap on the beach. Continuing our trek, we hiked for a few more hours to eventually arrive at our first campsite at Bear Beach. There were many small flat areas to camp, and we found a small sheltered area in the trees. Having some tree shelter was a MUST, since the dew and mist from the ocean made the fly on the tent very wet. I had the brilliant idea to hammock the whole trip, so I had set up my hammock under some trees, and built a makeshift tarp over me using plastic drop sheets. This worked extremely well, as I stayed bone dry all night, however, the wind from the ocean did make for a chilly night. I was bundled up in many layers, with just my mouth exposed to breath. It was stunning to fall asleep listening to the waves crash on the shore just meters from where I hung.
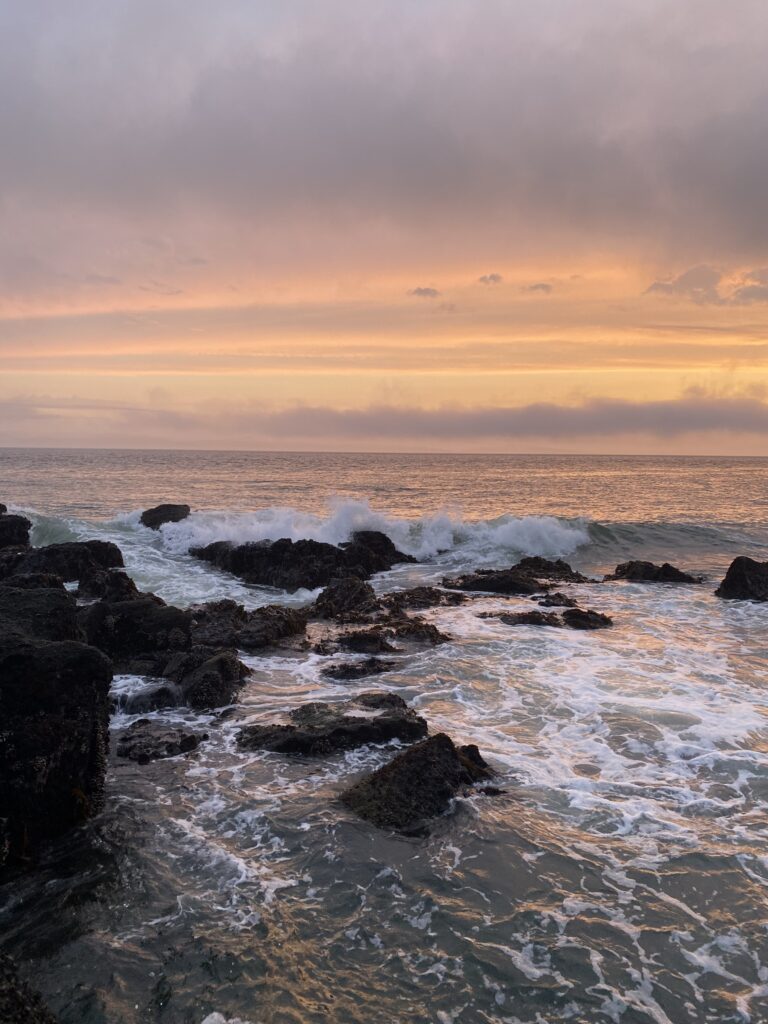
Day 2: We hiked from Bear Beach to Chin beach, which was a 8.7km trek, and again had many ups and downs. Due to the heavy dew and mist from the night before, the trail was quite muddy, and in parts rather slippery. We would hike up a hill for 20 minutes or so, and then hike down the other side, and this pattern continued for most of the day. We crossed the occasional bridge, and staircase, which were in great condition and felt very safe. 100% waterproof boots were an absolute MUST for this day, and would even recommend wearing gators for when your foot sinks into a mud pit!! We arrived at Chin beach in the late afternoon, and enjoyed a warm meal, played some card games, and watched a beautiful sunset. We even saw some humpback whales in the far distance! The wind really was strong on this beach though, and so the second the sun set we immediately went to bed to warm up in our sleeping bags. There were multiple wooden tent pads at this site, and some great trees for hanging my hammock.
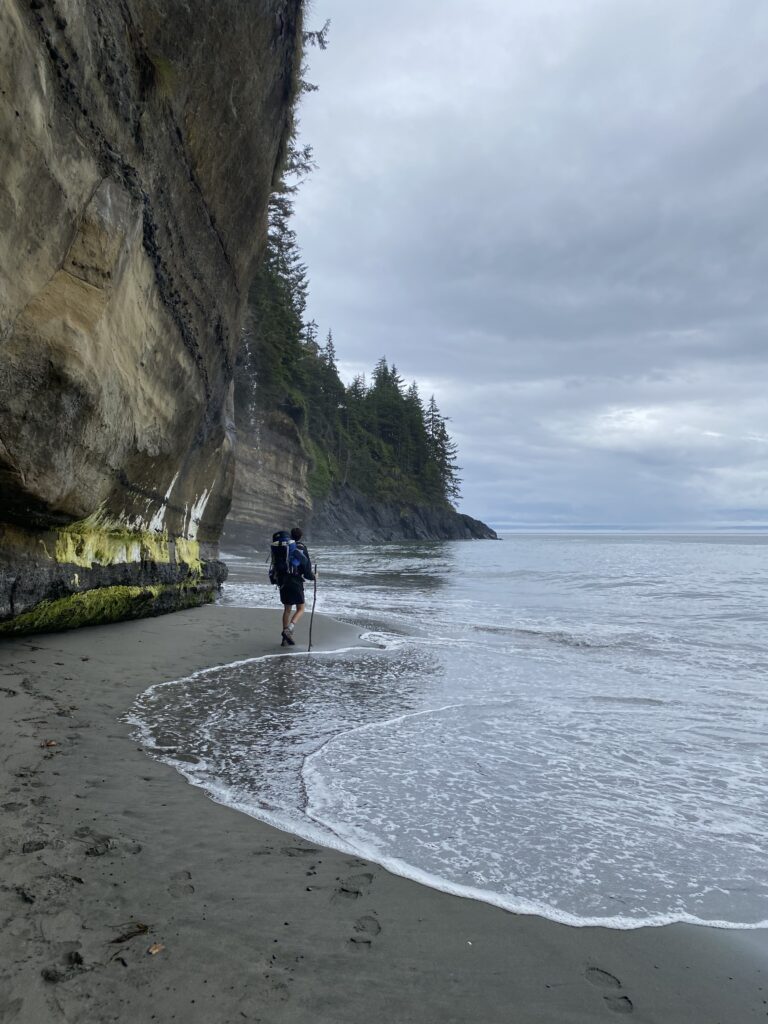
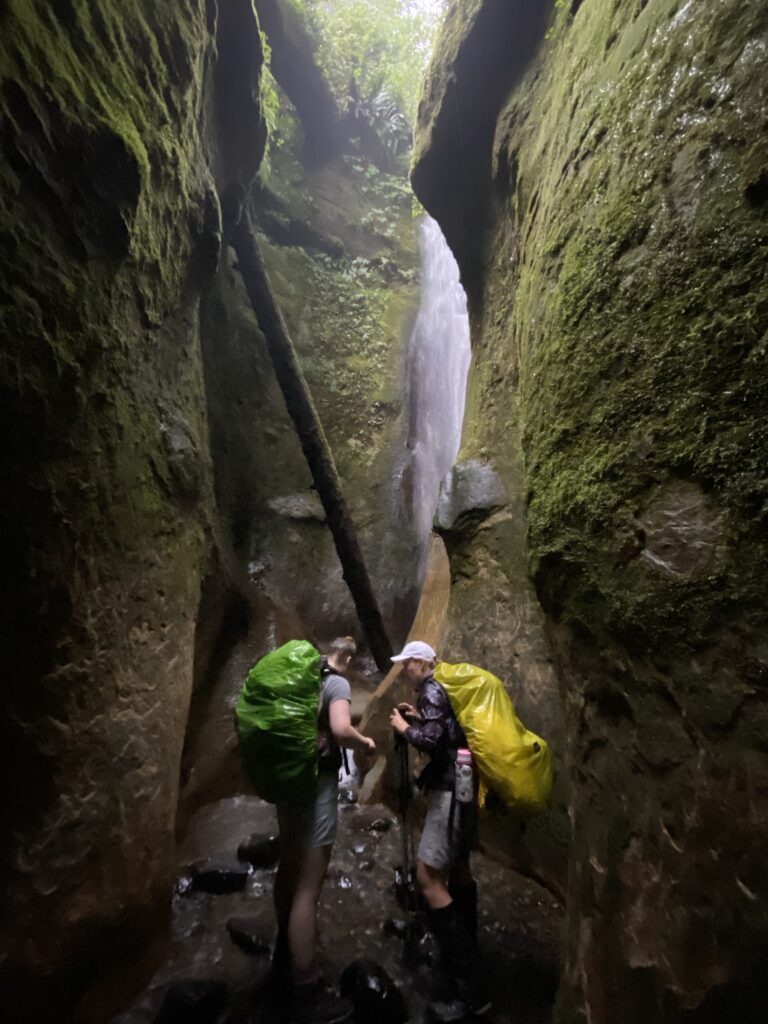
Day 3: We started the day early, and got moving at around 7:30am. We hiked a total of 7km this day, but it felt much longer. It started to pour rain at around km 5, which made the final 2km push a wet and very cold stretch. However, this was in my opinion the most beautiful segment of the trail, as it was a lot of hiking along cliffs and bluffs right above the ocean below. There were some ladders and wooden staircases built to add safety and support to some of the steep sections where it would otherwise be muddy and incredibly slippery. We finished our hike at West Sombrio beach, and of course had to check out the hidden waterfall in the canyon. The waterfall is just a short couple hundred meters off the beach, and a very unique gem tucked away.
Some things to consider if you are thinking about doing this trail: 1.) It is very wet terrain, and so fully waterproof gear (jacket, pants, books, large rain hat) is an absolute must. 2). It is continuous up and down, so although you rarely have high lookouts (compared to mountain hiking), your legs will be very sore as it works both your quads and your calves each day. 3.) We had to hitchhike a ride with strangers from Sombrio Beach back to the trailhead at China beach. Thankfully some nice tourists were willing to drive us back, as the bus is very expensive (~40$ a person), and only comes every few hours.
The Sunshine Coast Trail (SCT) is a 180km trail that tours along the sunshine coast of BC. The trail is very well-marked, and has multiple entrance and exit points that allow hikers to conquer a small segment, rather than having to tackle the entire trail. The purposes of this article will be to share the itinerary that I did, and give some helpful tips were I to hike this trail again!
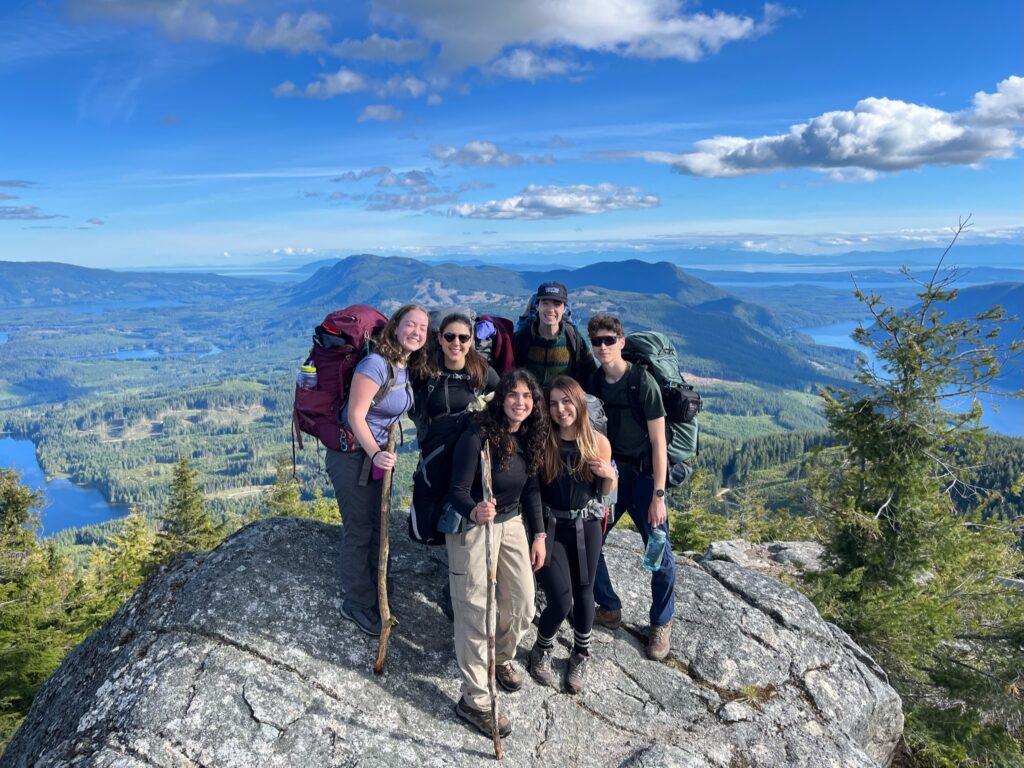
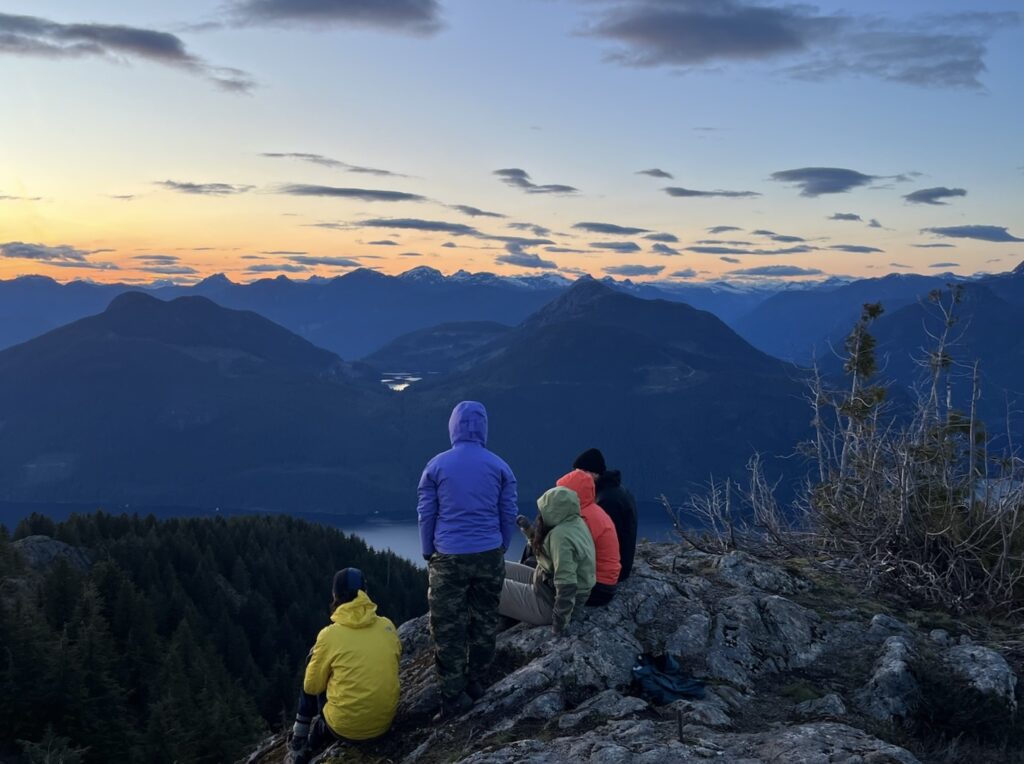
I, along with a group of 5 other friends, backpacked a 35km segment of the SCT in early June. We hiked the section from Tin Hat mountain to Inland Lake. We were incredibly blessed with (mostly) good weather, as the first 2 days were quite sunny and a comfortable temperature, and only the last day did we endure heavy rain for our final 10km push.
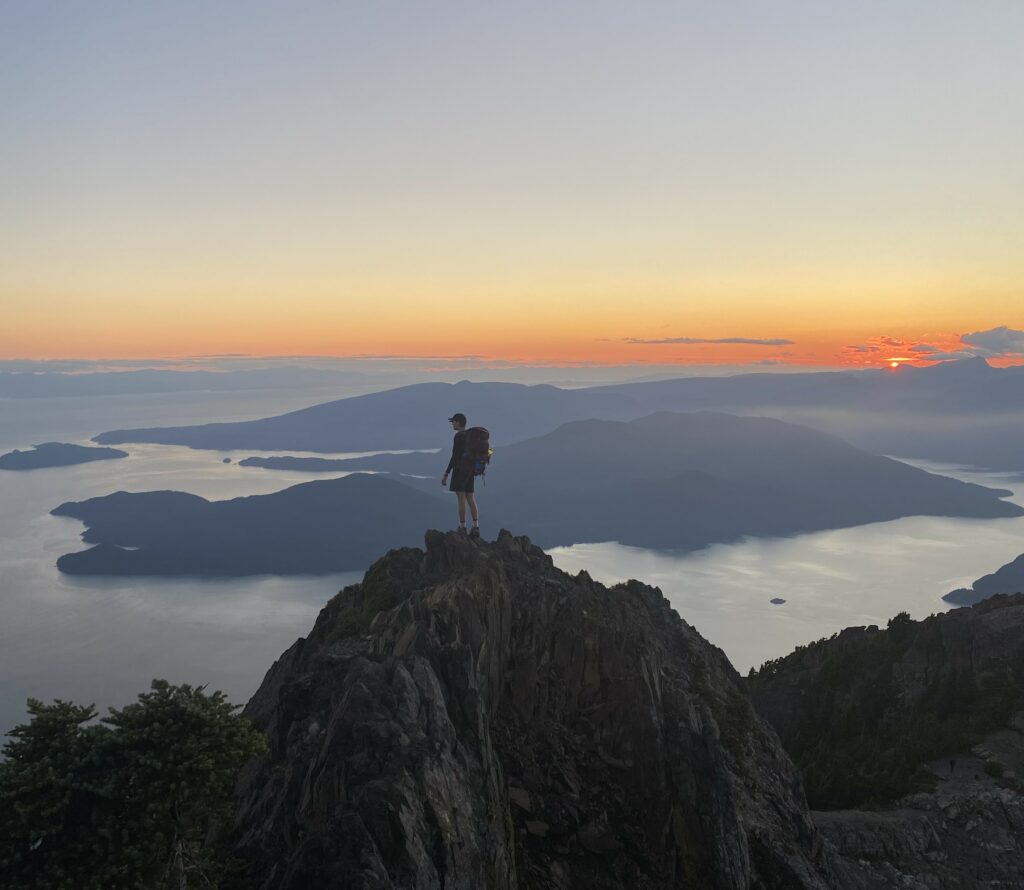
Day 1: There were 6 of us, so we took 2 cars to the base of the SCT. Here comes the challenging part: We parked 1 car at the base of Inland lake in the parking lot, and then piled 6 adult passengers AND 6 large hiking backpacks into one car. To say we were packed like sardines is an understatement. We then drove from Inland Lake parking lot up a long gravel road to get to the base of Tin Hat Mountain. This drive was just under 1 hour (~55 minutes). The car didn’t have 4×4 and we were fine, however we had to take it slow due to the number of potholes. We then parked the car in the small pullout area near the end of this gravel road, and began the hike. The terrain was a fairly constant uphill climb, so hiking poles may have been helpful. However, the ascent never required using hands and legs (it wasn’t THAT vertical thankfully). The total distance of this day was only around 4.5km. The view from the top was awesome, and we saw a gorgeous sunset! The hut itself was full already, but multiple tent pads were open, so we had our choice of tent site. Bear caches were provided for our food. The wind was very strong and very cold, so our warm layers and cold-rated sleeping bags were much appreciated!! Below is a pic of us at the summit of Tin Hat Mountain, and the sunset at the top 🙂
Day 2: We woke up and ate breakfast at the top of Tin Hat mountain, and then hiked for just over 7 km to Fiddlehead landing. This section was pretty, but almost entirely downhill, with some parts being very steep and requiring slow and braced steps. Be prepared for your knees to hurt. However, the path was very well marked, so we always knew where we were going. We ended up accidentally camping at the old Fiddlehead campsite as we were extremely tired from the sheer decent. The real Fiddlehead campsite was approximately 1km further, but we didn’t realize it at the time, as we hadn’t seen pictures of Fiddlehead to reference.
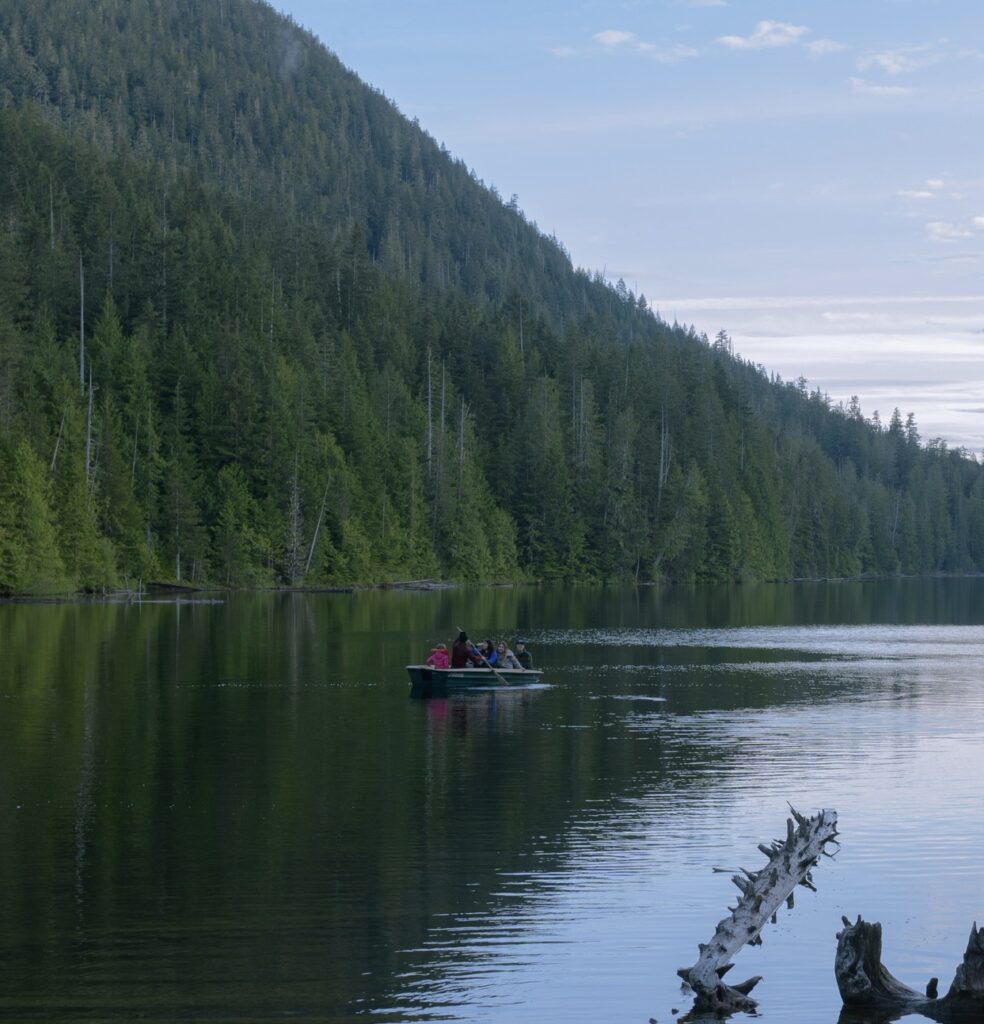
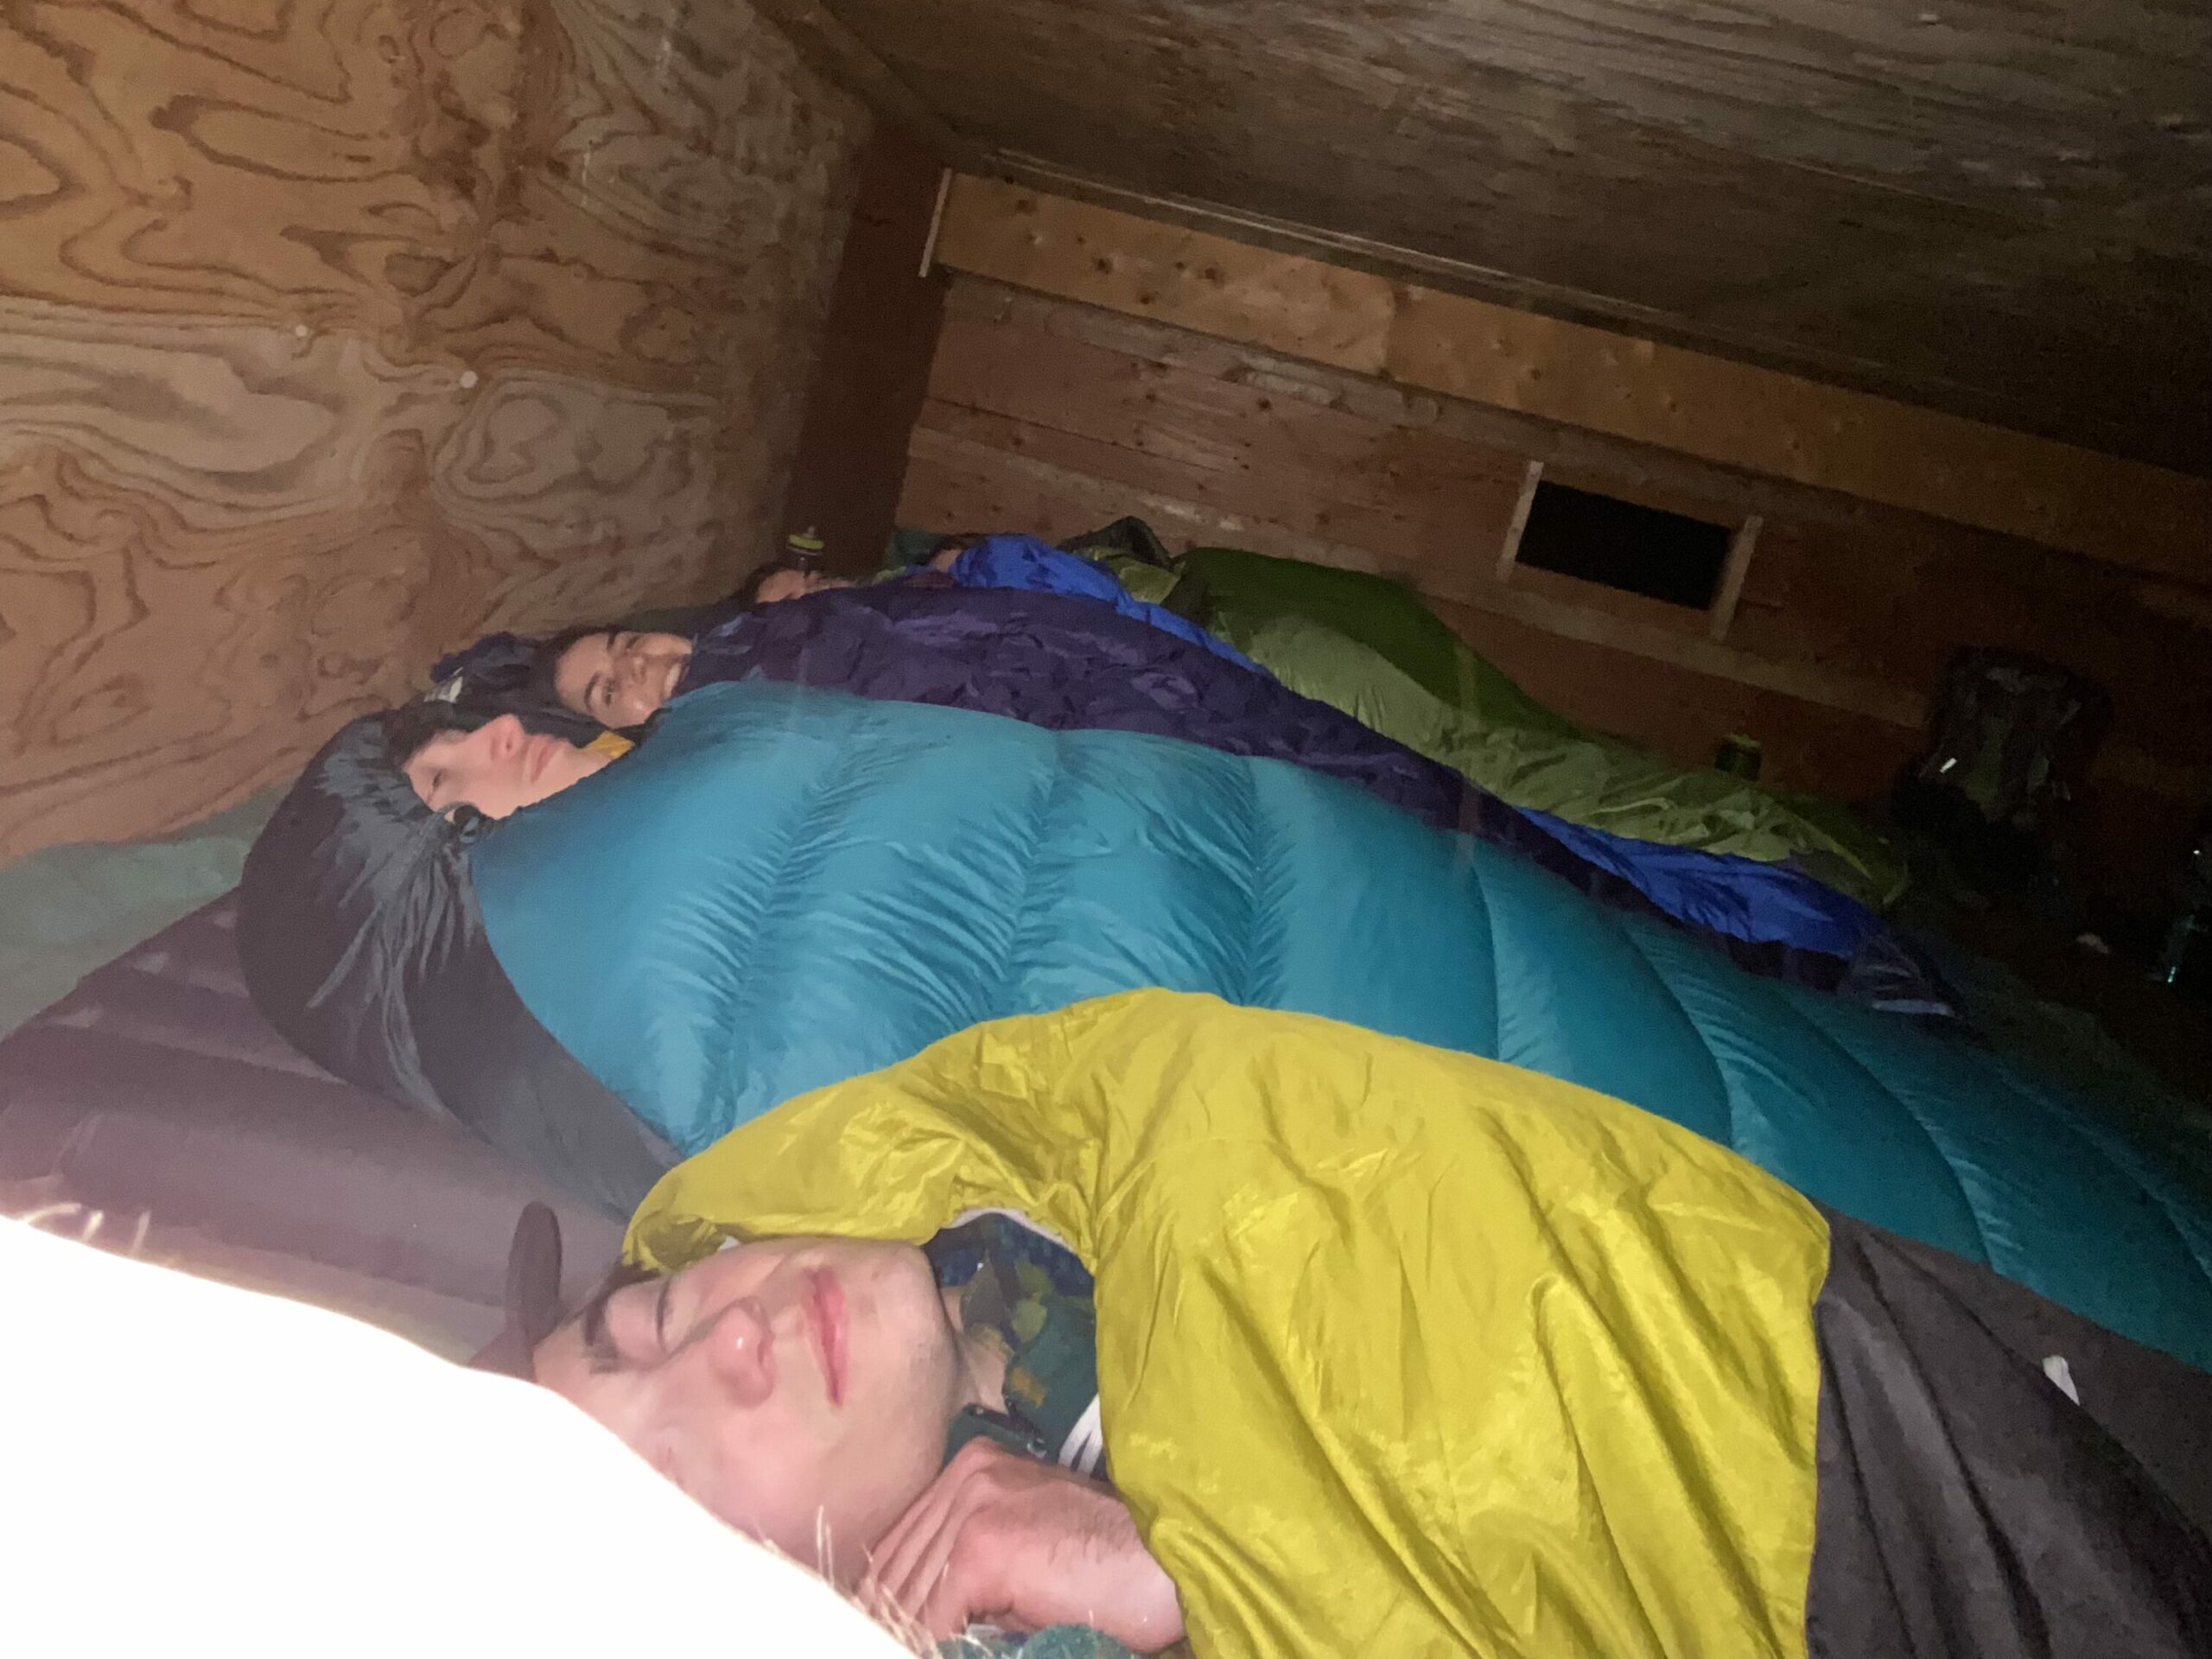
Day 3: Again we woke up quite early to eat breakfast and then get a head start on the day. We hiked to Confederation lake, which was just over 8.5 kilometers, and a lot of up and down terrain. We got the occasional peak-a-boo view, but mainly were hiking through forest. We were then greeted by Confederation Hut that is situated right on Confederation Lake. There is a nice picnic table, bear caches, and even a rowboat! We stayed in the hut in the lowest level (door is around the back of the hut). We were comfortable able to fit 6 of us, and have our bags by our feet.
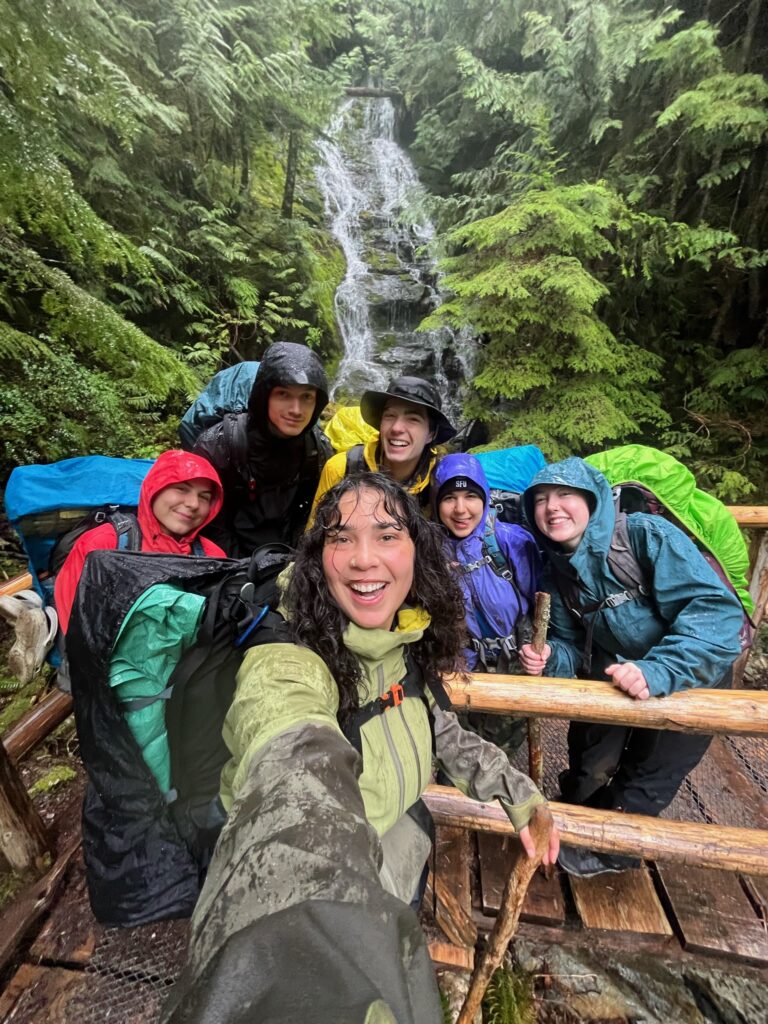
Day 4: We woke up to POURING rain. How fun. We had a 10km hike ahead of us to get to Inland lake. We came prepared with our rain gear though, so we geared up and began our hike. This part was probably the easiest of the 4 days, and had some gradual ups and downs, and the occasion steep incline or decline. Even though we were fully in tree cover, the rain was pouring so hard that we were still drenched rats. Once we arrived at Inland we were very cold, very wet, but honestly having the time of our lives! Something about backpacking with friends is just a blast no matter what. 🙂 We then drove back to the ferries to head home.
This trip was truly unforgettable. Not just because of the amazing people I went with, but because of the variety of terrain, stunning views, and (mostly) great weather. One of the best perks of the SCT is the ability to lengthen/shorten your trip to your liking. For us, we decided ahead of time to backpack the segment that we did, but we met other hikers along the way who were doing longer 5 or 6 night trips, and some who were just doing 1 and 2 nights. Would highly recommend this trip to anyone looking for an amazing outdoor adventure 🙂
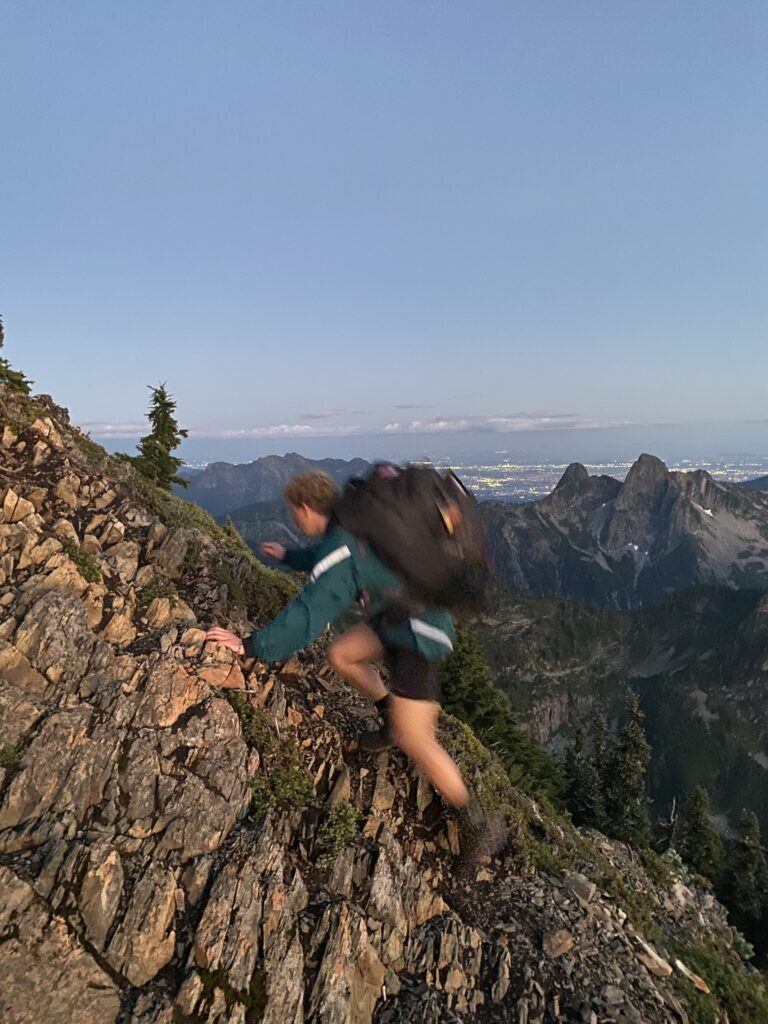
If you’re looking for a short, intense, few hour hike with INCREDIBLE views, Brunswick Mountain is the one for you. This blog will contain information around location, duration and maps, type and difficulty of terrain, packing essentials, and helpful tips. For context, please keep in mind that I am a 22 year-old male, who is quite physically active, so I will try my best to give unbiased estimates regarding this hike, but duration and difficulty is subjective to the individual.
Location: The parking lot for Brunswick Mountain hike is located just off of Highway 99, approximately a 40 minute drive from Vancouver. The parking lot is small, with room for only around 15 cars. Parking costs 3$/hr of 24$/day. Parking directions are unclear if the 24$ is for a calendar day, or a 24 hour period. However, we paid the 24$ as we made this hike into an overnight trip, and when we arrived back at the car the next day (approx 30 hours after paying) we were fine and didn’t have a ticket. Below is a Google Maps link to the parking lot. https://www.google.ca/maps/place/Sunset+Trailhead+Public+Pay+Parking/@49.4706866,-123.2373695,17z/data=!3m1!4b1!4m6!3m5!1s0x548669c07da0facf:0x92296f1579771e6c!8m2!3d49.4706866!4d-123.2347946!16s%2Fg%2F11hz5vzk19?entry=ttu&g_ep=EgoyMDI1MDExMC4wIKXMDSoASAFQAw%3D%3D
Duration and Maps: The total time from the parking lot to the summit took 3.5 hours, and we took short breaks only around once an hour. On the way down, it took us 4.25 hours, as we needed to take more breaks as the decline is quite hard on the knees. This map is helpful to see length and elevation! https://www.outdoorvancouver.ca/featured-trail-brunswick-mountain/
Difficulty: The terrain is split into segments. The first 2 hours are very easy, with gradual but continuous incline, hiking along a very wide gravel path that appears to have been used as a logging road at some point. The next hour begins to climb quite vertically, with occasional peekaboo views of the mountains and ocean. This segment involves climbing over tree roots and stumps. Poles recommended. The next segment becomes a scramble, and hands and feet are both used for most of it to add grip and support. The final segment is very short (approximately 7 minutes), but involves walking along a narrow ridge with steep drops on each side. Using both hands and feet are somewhat required for this part.
Packing Essentials: This hike could be done as an out-and-back if leaving early in the morning. NOTE: This hike would be very dangerous to do in the dark, so ensure more than enough daylight hours when starting. Check out my other post for a full list of packing essentials for out-&-back day hikes, and overnight backpacking. *We did this hike at the end of August, and although full sun, the temperature at the top was very cold, and varied between 1-2 degrees celsius at night. There are also many friendly mice that will try to steal your food! A scent-proof food bag is essential.
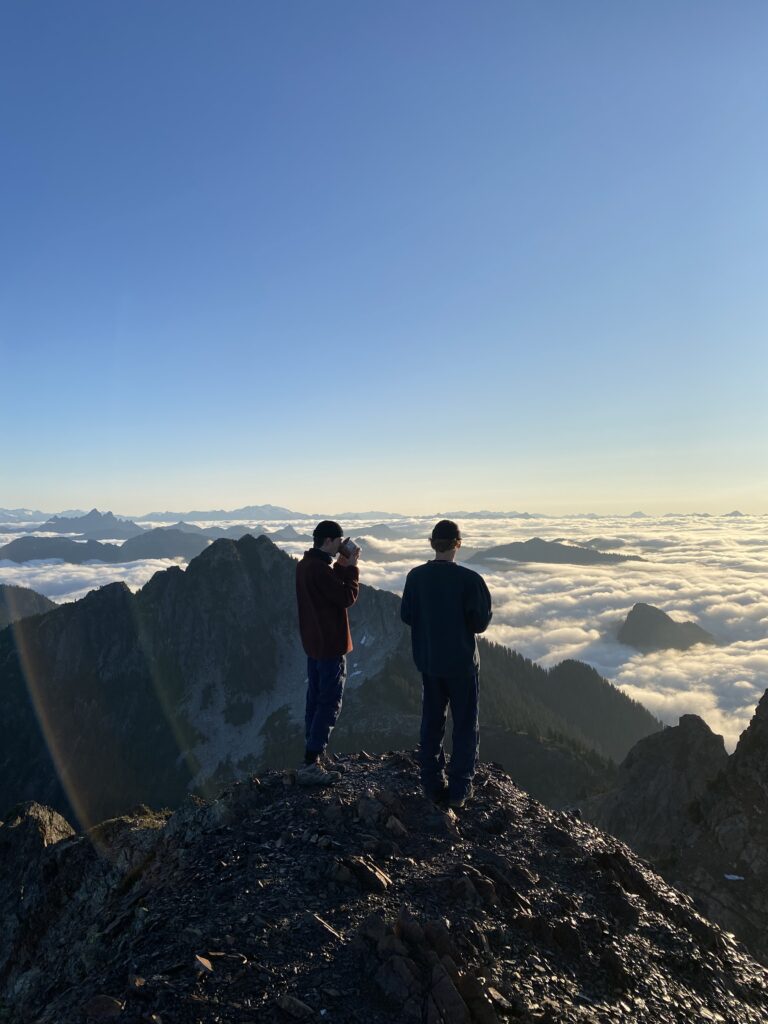
Helpful Tips: Hiking poles would have been nice! We did not bring them, so we found pole-sized sticks and used those for the first 3/4 of the hike. Pictures simply do not do justice to the beauty of the views. Aim to go on a clear-day with high-to-perfect visibility. If you want to experience sunrise and sunset on the summit, I HIGHLY recommend camping at the top! Tent space is limited, (no real designated area, but a few somewhat flat-ish spots) so you have to get creative. The sunset is stunning over the ocean, and the sunrise is equally as stunning with 360 degree views of all the surrounding mountains. Due to the elevation, Brunswick can experience an inversion (being above the clouds), which created a unique sunrise experience. I thought the trail was very well-marked, however having a subscription to AllTrails+ was handy, as it shows your location on the map, points which direction to keep hiking in, and tracks how far you have gone.